
Smyrna Wood Flooring has handled wood floor refinishing in Smyrna, GA for more than 20 years, serving surrounding cities including Vinings, Fair Oaks, Mableton, Marietta and Austell. We sand floors back to clean wood, lay stain samples where you can judge them, and put down a finish chosen for the way your house is actually used.
The first thing we do on any refinishing job is measure how much wood is left. Every full sanding removes some, and a floor that has been sanded twice before needs a lighter hand than one that never has. That single check decides whether your floor gets a full sanding, a screen and recoat, or a mix of refinishing and board replacement.
From oak strip hidden under carpet to heart pine with a century of patina, each floor we refinish is treated as the wood it is. The result should look like your floor at its best, not like a new floor dropped into an old house.
Deciding What Your Floor Needs
Full Sanding Versus a Screen and Recoat
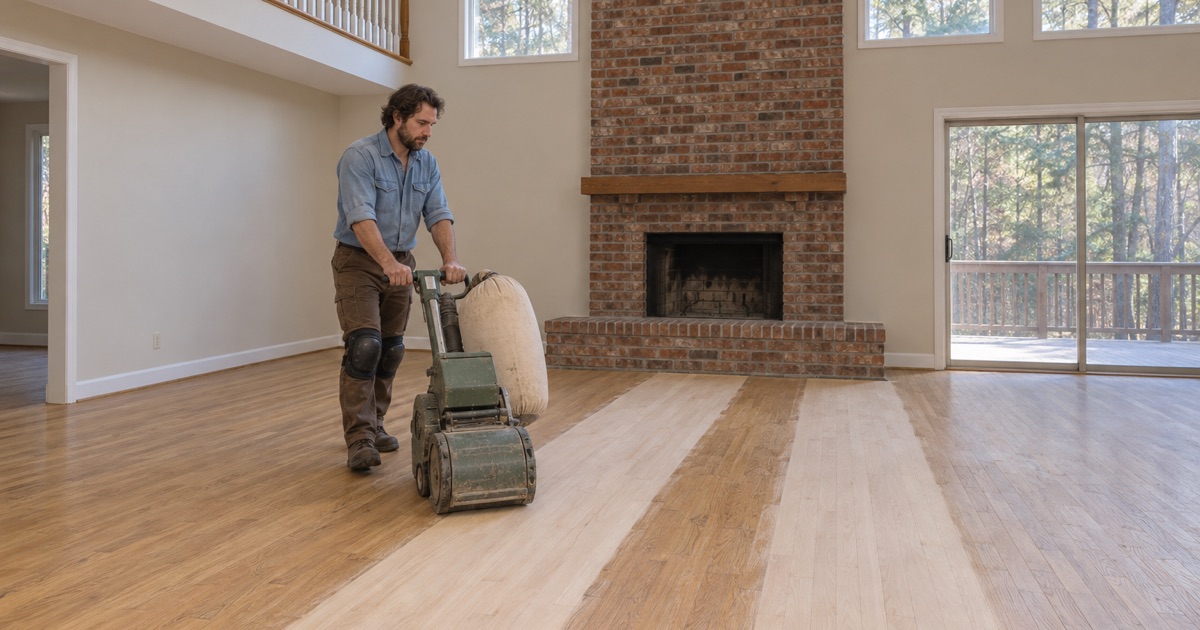
A full sanding strips the old finish and the top of the wood, removing scratches, dents, water stains and sun fade in one pass. A screen and recoat only abrades the existing finish and adds a fresh coat, so it works when the finish is worn but intact.
We look at the traffic lanes first. Where they are gray and the wood is exposed, the finish has failed and only sanding will fix it; where they are just dull, a recoat saves you most of the cost and the dust.
Checking the Wear Left Above the Tongue
Solid hardwood can only be sanded down to the tongue before the fasteners show. We pull a vent cover or a threshold to see the board edge and measure what is left, which matters most on site-finished oak from 1980s subdivisions that has likely been sanded before.
If there is enough wood, we refinish rather than tear out. If there is not, we tell you plainly and price board replacement or a recoat instead of sanding into the tongue.
Testing Old Finishes Before Sanding
Older floors often carry shellac, paste wax or a painted finish under the surface you see. A new polyurethane will not bond over wax, and paint in a home built before 1978 has to be treated as lead until tested.
We test these surfaces before any sander touches the floor. The test takes minutes and prevents the most expensive refinishing failure there is: a new finish peeling off within the first year.
Sanding and Color
The Grit Sequence and Dust Control
We sand with a drum sander along the length of the boards, work the edges with an edger, and finish with an orbital sander through a stepped grit sequence. Skipping grits leaves scratch marks that show once stain goes on, so we do not skip them.
Our sanders are connected to a vacuum system for dustless sanding. Dust still happens, but it stays at the machine rather than drifting into closets and ductwork.
Stain Samples on Your Own Floor
We lay several stain samples on your freshly sanded floor, in the room where the color will live. Red oak, white oak and heart pine each take the same stain differently, and morning and evening light change it again.
For darker colors we use water popping, which raises the grain so the stain takes evenly instead of blotching. You choose from the samples in front of you, not from a printed chart.
Removing Orange Oak and Old Color
Orange oak happens when an oil-based finish ambers on red oak over the years. Sanding to bare wood removes that tone, and a clear waterborne finish or a neutral stain keeps it from returning.
The same process changes the honey color common in 1980s homes to a gray, brown or natural look. We confirm there is enough wood to sand before promising a color change.
Finishes and How They Wear
Waterborne Polyurethane
Waterborne polyurethane dries clear, stays clear, and lets us apply more than one coat in a day. It is our usual choice for light floors, white oak and busy households, and its low odor makes it easier to live around during the work.
Oil-Modified Polyurethane and Hardwax Oil
Oil-modified polyurethane gives a warmer, amber tone that suits heart pine and traditional red oak, but it takes longer to dry and cure. Hardwax oil soaks into the wood for a low-sheen look and can be spot repaired, at the cost of more upkeep.
Choosing the Sheen Level
Sheen level changes how a floor looks as much as color does. Matte and satin hide scratches and dust, while semi-gloss and gloss show every mark. We show you sheen samples alongside the stain so the decision is made together.
Floors We Refinish Most Often
Oak Strip Under Carpet in 1950s and 1960s Ranches
Smyrna has more than four thousand homes from the 1950s and 1960s, and many of them still hide oak strip flooring under wall-to-wall carpet. When the carpet pad and tack strip come up, the oak underneath is usually sound but pocked with nail holes and staple rows along the walls.
We fill those holes and staple rows with a color-matched filler rather than hoping a dark stain will hide them. Sanded and finished, a floor that sat under carpet for decades often looks better than anything that could replace it.
Heart Pine and Old Oak in Intown Homes
Heart pine and old growth longleaf pine are softer and more resinous than oak, and they can show sap bleed through a fresh finish if the wood is not sealed first. We sand them with a lighter touch and choose a finish that lets the patina deepen rather than bleaching it away.
Where old boards are missing or damaged, we patch with reclaimed or matched stock and blend the color to the surrounding floor. The aim is a floor that still looks its age, only cared for.
Townhome and Engineered Floors
About one Smyrna owner household in four lives in a townhome-type home, where the declaration may set rules on work hours or finishes. We confirm the association’s written approval before starting, since any interior flooring rule comes from your own documents rather than state law.
Engineered floors in these homes can often be refinished once or twice, depending on the engineered wear layer. We check its thickness first and recommend a recoat whenever sanding would come too close to the core.
Our Step-by-Step Wood Floor Refinishing Process
Step 1: Measure and Test
We measure wear above the tongue, take moisture meter readings where boards are cupped or stained, and test old finishes and painted surfaces. You get a written scope based on what the floor can actually take, including any repairs the sanding will expose.
Step 2: Repair Before Sanding
Loose boards are secured, damaged boards replaced and gaps addressed before the first pass, so every repair is sanded flat with the rest of the floor. Doing it in this order is what makes a patched floor look like one continuous surface.
Step 3: Sand, Sample and Stain
The floor is sanded through the full grit sequence and the edges are blended into the field. Stain samples go down next, and once you choose a color, it is applied across the floor in one continuous session so the tone stays even.
Step 4: Finish Coats and Cure
We apply the finish in thin, even coats, lightly abrading between them for adhesion. Before we leave, we walk you through dry times, felt pads, and when rugs can go back down, since the finish keeps curing for weeks after it feels dry.
- 20+ Years on Wood Floors
- Moisture Readings Before Repairs
- Stain Samples on Your Floor