
Smyrna Wood Flooring installs engineered hardwood flooring in Smyrna, GA and has for more than 20 years, serving surrounding cities including Vinings, Fair Oaks, Mableton, Marietta and Austell. We help you pick a board with the right wear layer and core for the room, test the slab or subfloor underneath, and install it using the method that surface actually calls for.
Engineered hardwood solves problems solid wood cannot. It can go over a concrete slab, into a condo with sound rules, or into a room where humidity swings too much for a solid board. It also comes in wide plank and white oak looks that would be costly or unstable as solid wood, which is why it has become the default in so many newer homes.
The product is only half the job. An engineered floor installed over a damp slab, an uneven subfloor or the wrong underlayment will gap, hollow out or cup just like any other wood floor, so most of our effort goes into what happens before the first board goes down.
How Engineered Hardwood Is Built
The Wear Layer and the Core
Every engineered board has a real hardwood surface, the engineered wear layer, bonded to a core of cross-laid plywood or another wood-based material. The core is what keeps the board stable, because its layers run in different directions and resist the swelling that makes solid boards cup.
The wear layer decides the floor’s future. A thick one can be sanded and refinished like solid hardwood, while a thin one can only be screened and recoated. We show you samples cut on edge so you can see the difference instead of reading it off a box.
Engineered Against Solid Hardwood
Solid hardwood is one piece of wood through its full thickness, so it can be sanded many times over its life. It is also more sensitive to moisture, and it is not a good fit directly over concrete or below grade.
Engineered hardwood trades some of that sanding life for stability and flexibility in where it can go. For a slab-on-grade home, a basement or a condo, that trade is usually worth it. For a wood subfloor on an upper story, either works, and the choice comes down to look, budget and how long you plan to stay.
Engineered Wood Against Luxury Vinyl Plank
Luxury vinyl plank is plastic printed to look like wood. It tolerates water better than any wood floor and costs less, which makes it a sensible choice for a laundry room or a rental unit that sees hard use.
What it cannot do is be refinished, and it does not feel or age like wood. We give you an honest comparison room by room, because engineered wood is not always the right answer and we would rather you choose the floor that suits the space.
Where Engineered Floors Work Best
Over a Concrete Slab
Concrete holds and releases moisture, and that moisture will reach any wood floor laid over it. Before we install on a slab, we test it for moisture, using ASTM F2170 relative humidity testing where the manufacturer calls for it, and we add the vapor retarder or moisture-rated adhesive that the reading requires.
Skipping that test is the most common reason slab installs fail. A floor that looks perfect on day one can cup across the whole room within a season if the slab was never checked.
Condos, Townhomes and Shared Walls
In a condo tower, an engineered floor goes in around freight elevator bookings, quiet hours and the acoustic underlayment the building requires. We read the declaration’s flooring rules with you and plan deliveries and cutting around them, so the job does not stall halfway.
In a townhome, any interior flooring rule comes from your own declaration, not from state law. We confirm the association’s written approval before ordering material, since roughly one Smyrna owner household in four lives in a townhome-type home where those rules may apply.
Rooms With Seasonal Humidity Swings
A humid Georgia summer followed by dry, heated winter air moves solid wood more than most homeowners expect. Engineered boards move less, which makes them a good fit for rooms over crawlspaces or near exterior doors where conditions change the most.
They still need the room’s moisture source dealt with first. If a crawlspace is damp, we tell you before installing, and we may recommend a dehumidifier or a vapor retarder as part of the job.
Installation Methods
Glue-Down Engineered Floors
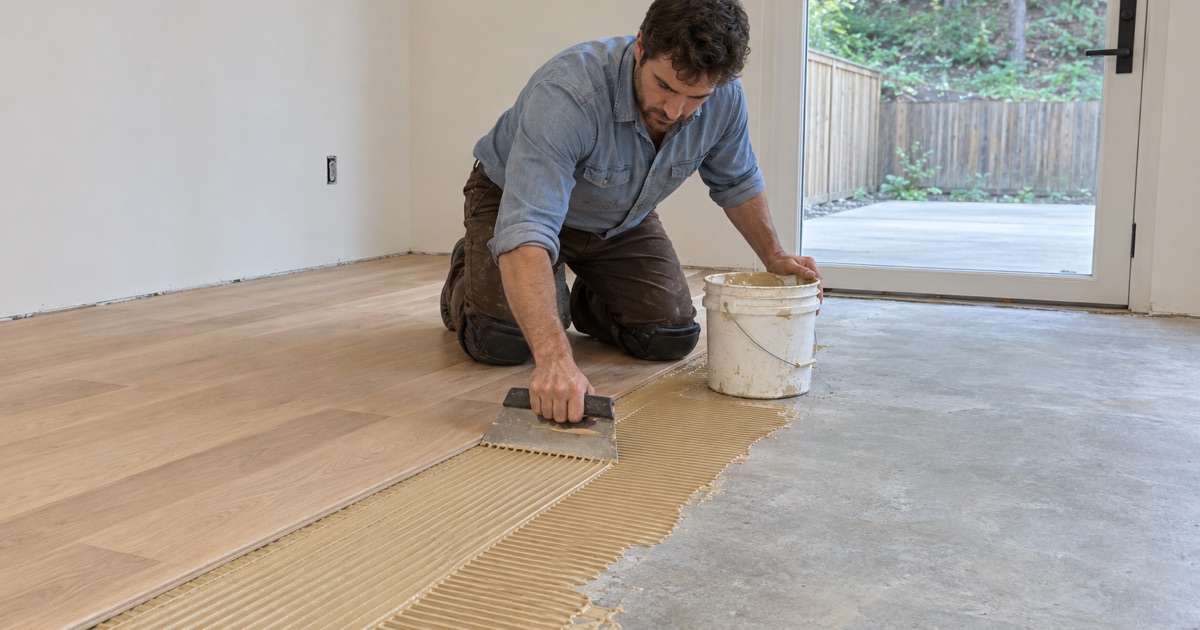
Glue-down engineered flooring is bonded directly to a slab or a wood subfloor with a flooring adhesive. It feels solid underfoot and sounds like a nailed floor, which is why we prefer it on concrete when the slab is flat and dry.
The adhesive must match the slab conditions, the board and the manufacturer’s instructions, or the warranty and the bond both suffer. We use adhesives rated for the job rather than whatever is on the shelf, and we trowel them at the coverage the label specifies.
Floating Engineered Floors
A floating floor locks board to board and rests on an underlayment without being fastened down. It installs quickly, works over surfaces that cannot take nails or glue, and can be the right answer in a condo that requires a specific acoustic underlayment.
The tradeoff is feel: a floating floor over an uneven subfloor can sound hollow. We flatten the subfloor first and leave the correct expansion gap at every wall, hidden under base or quarter round.
Nail-Down or Staple-Down Engineered Floors
Over a wood subfloor, thicker engineered boards can be fastened with flooring cleats or flooring staples just like solid hardwood. This gives a firm, quiet floor and is often the simplest route on upper stories.
We choose fastener length and spacing to suit the board thickness, following the NWFA Installation Guidelines and the manufacturer’s instructions, since wrong fasteners can split tongues or leave loose boards.
Our Step-by-Step Engineered Hardwood Flooring Process
Step 1: Test the Subfloor or Slab
We check the slab or subfloor for moisture, flatness and soundness, and we take moisture meter readings on the new boards. The results decide the install method and whether any subfloor work is needed first. If a reading is high, we find the source and deal with it before anything is ordered, rather than hoping the adhesive or underlayment will hold it back.
Step 2: Acclimate and Prepare
The flooring sits in your home until it matches the house’s conditions. Meanwhile we remove old flooring, fix squeaks and flatten high or low spots, because the finished floor can only be as flat as what is under it. Acclimation time depends on the product and the season, and we follow the manufacturer’s guidance rather than a fixed number of days.
Step 3: Install and Trim
We lay the floor from a straight reference line, stagger the joints, and leave the expansion gap at every wall. Reducers, thresholds and quarter round finish the edges where the new floor meets tile, carpet or stairs. Doors are undercut where needed so they swing clear of the new height, and we check every transition for trip edges before we call the room done.
Step 4: Walkthrough and Care
We walk the finished floor with you, point out any transitions or special areas, and explain how to clean the factory finish. You get care instructions written for the product that was installed, not a generic sheet. We also note the wear layer thickness on your paperwork, so whoever refinishes the floor years from now knows exactly how much wood there is to work with.
- 20+ Years on Wood Floors
- Moisture Readings Before Repairs
- Stain Samples on Your Floor